Popup requiring a click on the object
On the stage we put any object can be, for example, a photo, description or illustration to which we want to popup.

We add another object as needed, it can be a plain text field with the "learn more" statement, the "i", "?" Icon, it can be an illustration of the meaning of the phrase
contained in the "popup" trigger

The object we added "object 2" will be the button by which we will run our popup, now we will create the content of the popup window - we add a new object. Enter
a text box that will conventionally include the description of the attached photos:

The next step will be the separation of layers - this will make it easier for us to work with popup content. At the bottom of the screen there is a "Timeline"
For our example, there are 3 objects - one of them is our popup - once you click on it, one of the timeline will change its color to be much brighter it will
be confirmation of choosing the right item.
The time line looks like this - you can see the popup item we selected

The next step will be to move the popup to the new layer by right-clicking on the timeline, with the options available:
"Layer", "Move selected items to new layer".

The new layer can be described as "popup", while our basic popup button will remain as "layer 1".
We put any interesting information on the popup scene. Popup can include sounds, video, graphics or text. The objects that we want to place in our popup or put into
it by dragging them - eg graphics from the disk, or using the menu located on the left part of the screen. These options correspond in turn to the addition of a text field,
an image, or a video file.

In this way we can make our popup more attractive with additional elements.

The next step will be to add a button allowing us to close our popup. We choose any object by which we hide the "popup layer" and return to the contents of the scene.
For the purposes of our presentation can use X letter, of course we can use a number of available icons - after placing it at the selected place on the stage we use the function
"triggers"

"Trigger" - if you select the object of interest in the upper right of the screen, the window that describes the scene changes from "scene" to "object" - we can define the behavior
of specific elements of our presentation.

Click on the window and see some information:
- When to do an action - click as initiator
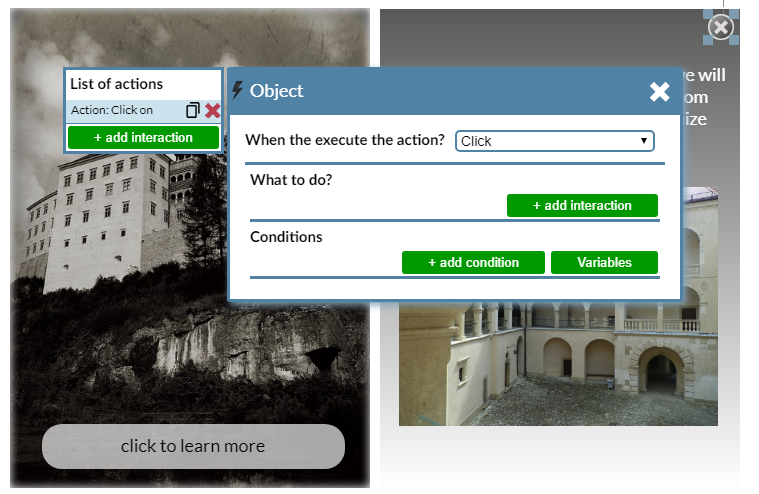

What to do
- We choose to hide layers
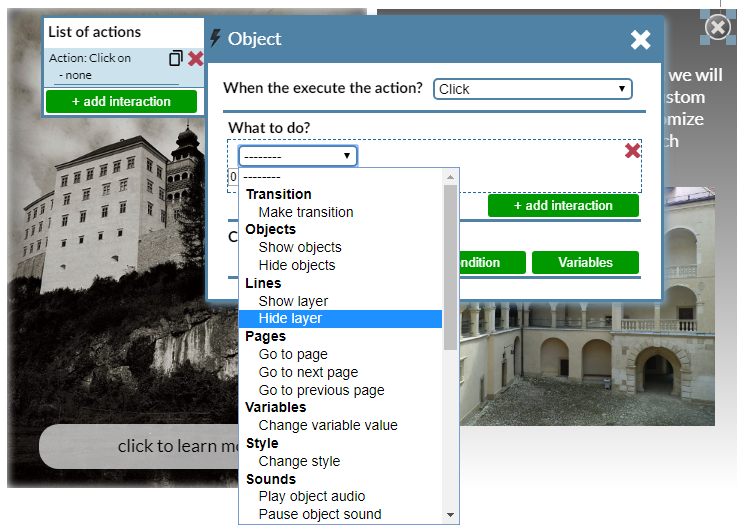

We see a window where we can determine which layer is hidden
- Hidde Layer after clicking the button:
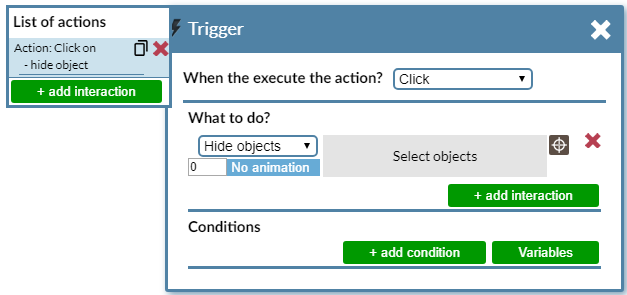

After clicking on the gray "Select layers" bar from the timeline, select the line called "Popup"

At the top of the screen we'll see the "Click here to finish" button This is confirmation of the button operation, the gray bar will appear get the sign: "L"

In addition, the triggering window will show that the trigger has been activated saved - looks like this:

If everything was done correctly after clicking our "X", our popup will be closed, there will be scene with photo and object 2.

Define Trigger - We have determined that Object 2 will be the button responsible for launching our popup. Launching it will be possible with the use of triggers
- click action, layer effect and on the timeline we mark the popup we created.

If everything has been done in accordance with the instructions we have a fully functional popup that we can use. All the information provided is a guide that offers the simplest
yet effective solution.