Time line.
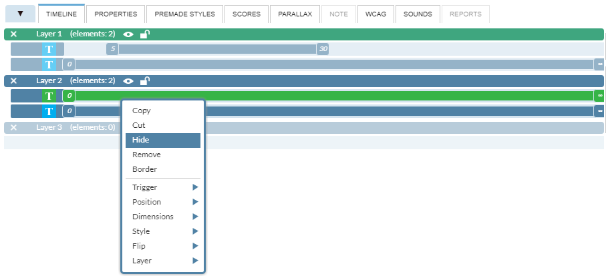
The time line object is located to the left at the bottom of the screen. It has the form of a series of strips that appear on the timeline, their number is the same
as the number of objects placed on the stage. When placing the first object on the timeline, it looks like this:
The time line allows us to organize the elements contained in our presentation, especially when we are working on a number of objects that we can divide into
layers. To do this on the layer we are on right click and from the available options we select: layer - move the selected elements to the new layer. Holding down
the Shift key allows you to select several items at the same time.
When you move an item to a new layer, the time line looks like this:
We also have the ability to copy an object to a new layer - we use this feature If on each layer we want to have the same element, eg navigation button.
The time line can also determine the moment when an object appears on the stage. Adjusting this time takes place by the length of each line - moving them from
left to right will determine their moment of appearing on stage.
The time line can also specify the object life time on the stage. Adjusting this time is done by the length of each line - moving them from right to left will determine
their "life time" on the stage. On the right hand side of the timeline, the numerical value indicates the time at which the item stops appearing on the stage.Leaving
the timeline slider at the start position causes the scene element to be visible to the end of the slide.
Sample item appearing in 5 seconds and performing on stage up to 30seconds is as follows:
Hide timeline layers / timeline elementsThe function management button is located on the timeline layer header, by clicking the "eye" icon we decide on the visibility
of the entire layer.
![]() - Marking the visible timeline / or entire layer
- Marking the visible timeline / or entire layer
![]() - Marking a hidden timeline / or entire layer
- Marking a hidden timeline / or entire layer
To hide a layer of time just click on the "eye" icon on the layer header, we can also do this by right-clicking on the appropriate layer - select hide from the context menu.
The hidden line is easy to locate because of the hidden colors of the hidden elements.
We can also hide individual timelines, not entire layers. In such a situation, we mark the time line that we are interested in, right-click and select "hide" from the context menu.
The color of the hidden item will immediately be visible.
If you have a lot of objects on the timeline, it may become less readable,In this case, we can change the view of our panel using:
The functionality is located to the right of the timeline at the bottom of the screen, allowing us to modify the way in which timelines are presented as follows:
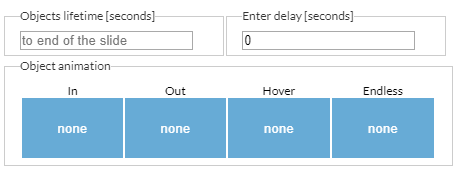
The effects of animation are the elements through which our presentation will "live" determine the behavior of individual elements. Animations are divided into 4 types - input, output, animation,
and continuous animation. Different animation effects can be assigned to each object on the timeline, and can be unified by assigning the same animation to each element within the layer.
After hovering over the animated animation, we see a presentation of the animation we chose.


